If you’re running an online store with Shopify, creating sub-pages (or child pages) is a great way to keep things organized. Sub-pages can help your customers navigate your store more easily by grouping related content under one main page. For example, under a “Shop” page, you might want sub-pages for “Men,” “Women,” or “Accessories.”
In this article, we’ll walk you through how to make sub-pages in Shopify. Don’t worry—it’s easier than it sounds!
How to Make Sub Pages in Shopify?
Similar to making a landing page in Shopify, creating sub-pages is easy. Follow these simple steps to create sub-pages for your Shopify store.
Step 1: Create a New Page
- Log in to your Shopify admin panel.
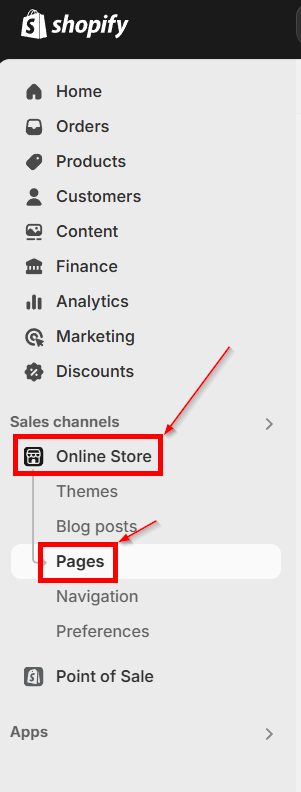
- On the left side of the screen, click Online Store > Pages.
- Click the Add page button.
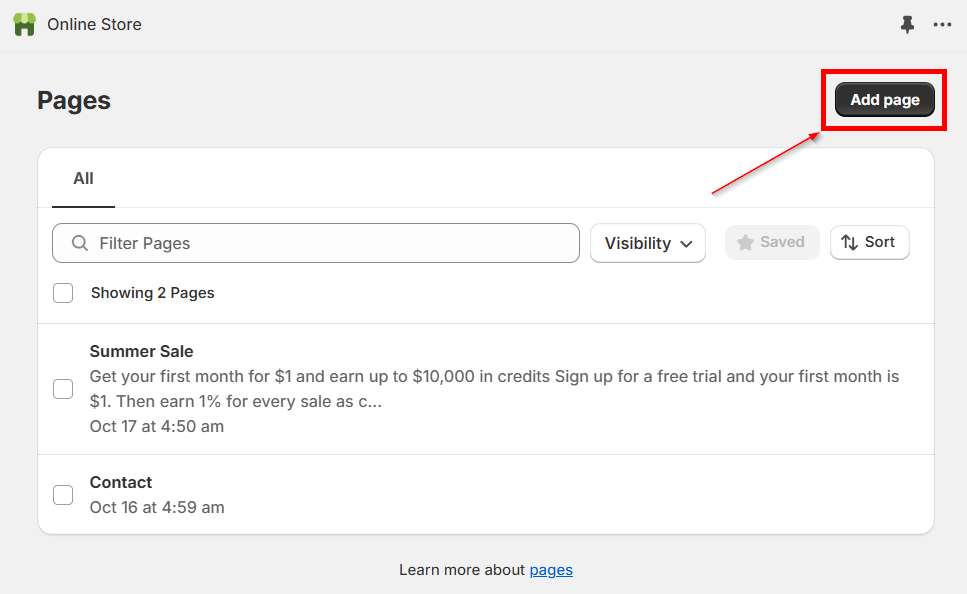
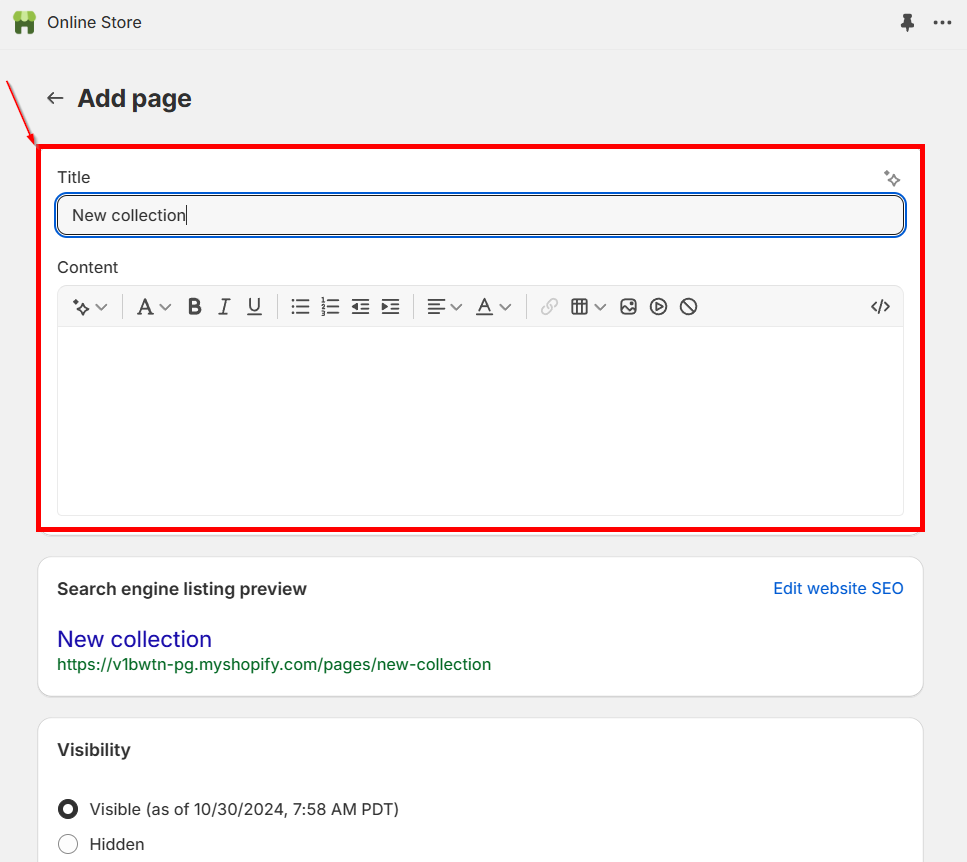
- Enter the title and content for the new page (this will be your sub-page).
- If you want, adjust the visibility or search engine listing settings.
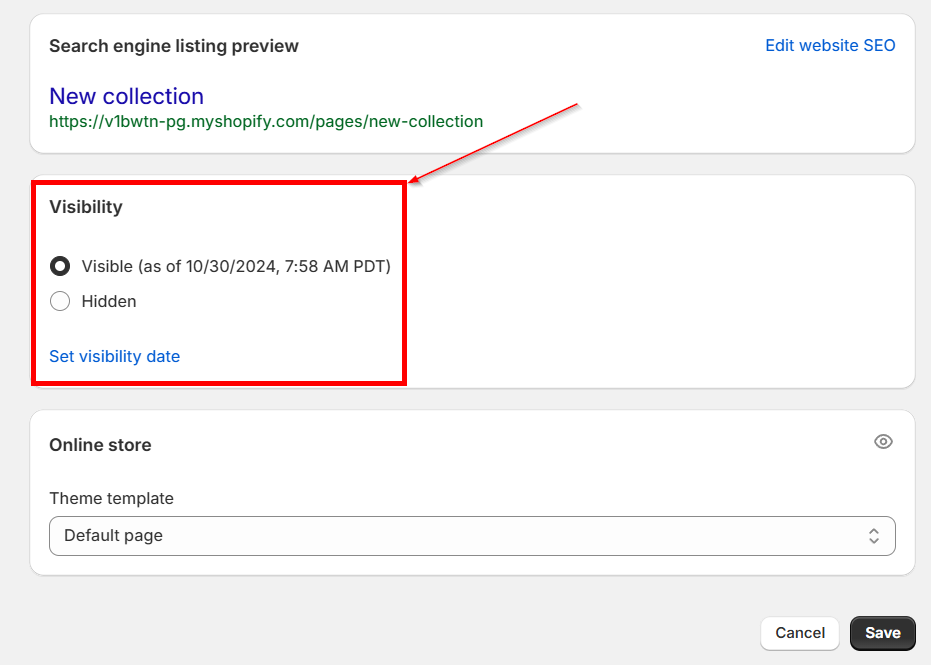
- Click Save when done.
Repeat this process for every sub-page you want to create.
Step 2: Create a Main Page (Optional)
If you don’t have a main (parent) page yet, you can follow the same steps to create a main page. This page will act as the “parent” that holds your sub-pages.
For example, if you’re creating a “Shop” page, you might want sub-pages like “Men,” “Women,” or “Sale” under it.
Step 3: Add Sub-Pages to Your Navigation Menu
Now that you’ve created the pages, the next step is to organize them in your store’s navigation menu.
- Go to Online Store > Navigation.
- Choose the menu where you want the sub-pages to appear (e.g., “Main Menu”).
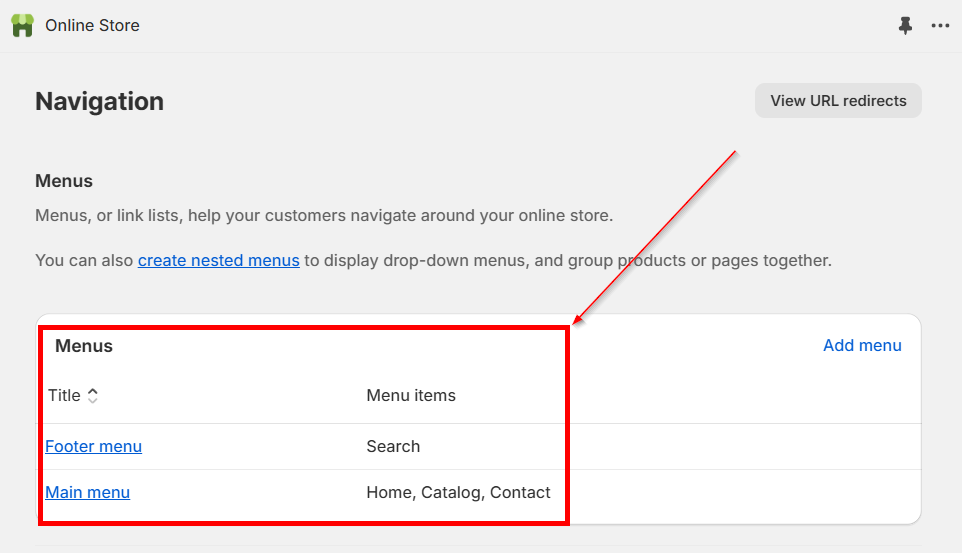
- Click Add menu item.
- Enter the name of the sub-page (e.g., “Men”).
- In the Link field, select Pages and choose the page you just created.
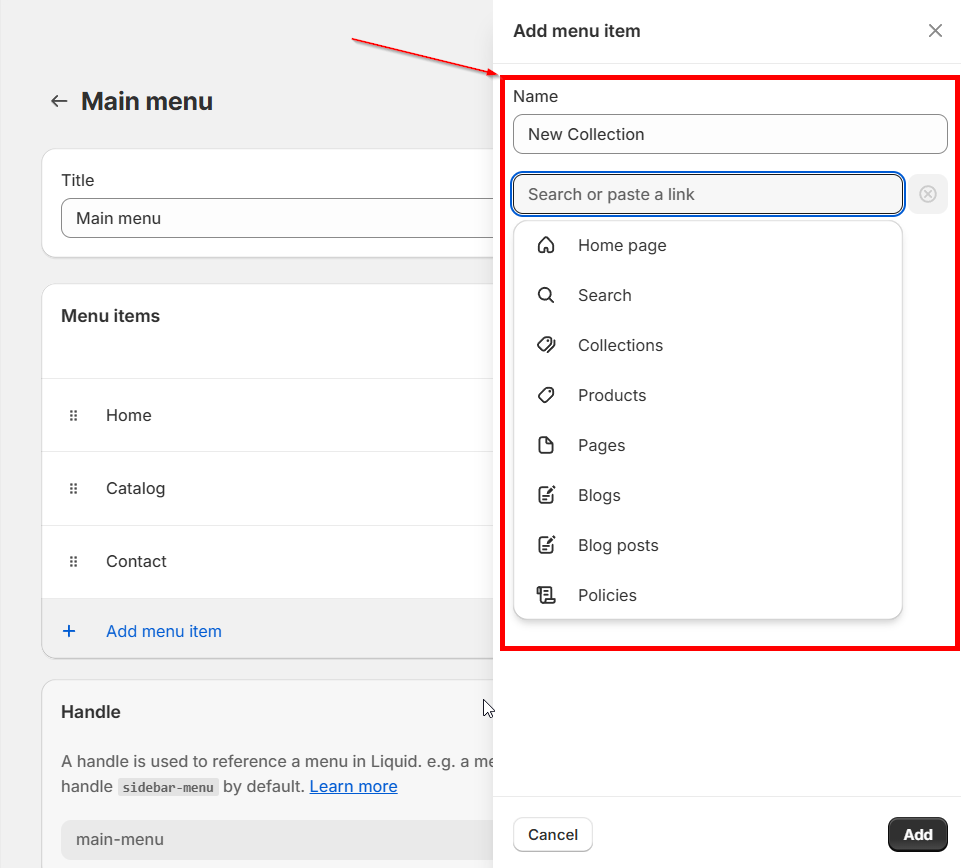
- Repeat for each sub-page you want to add.
Step 4: Nest Sub-Pages Under a Main Page
After adding your sub-pages to the menu, you can organize them as sub-items.
- In the same menu editor, drag each sub-page slightly to the right under the main page.
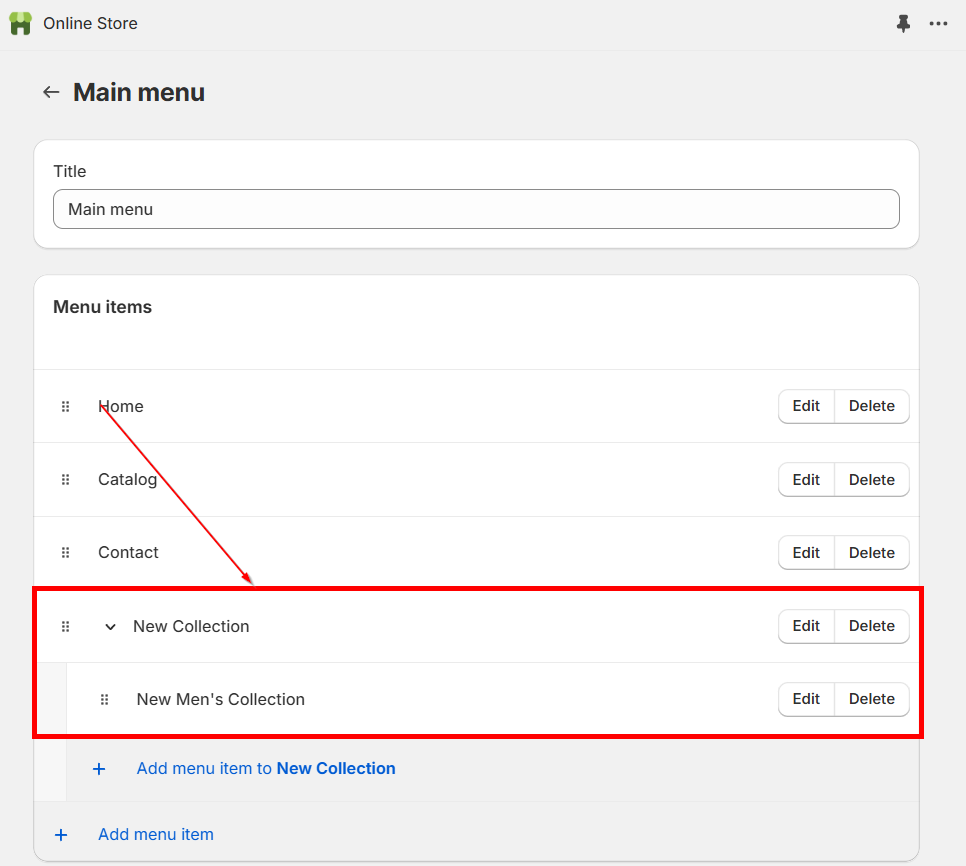
- This will nest the page as a child item under the parent page.
- Click Save menu when you’re done.
Why Create Sub-Pages?
Using sub-pages to organize your Shopify store can have a significant impact on both customer experience and business performance.
Here’s a deeper look at the key benefits of setting up sub-pages:
1. Better User Experience
Sub-pages make it easy for customers to find what they need:
- Faster Navigation: Shoppers can quickly browse specific categories like “Men’s Shoes” or “Winter Accessories.”
- Higher Engagement: A smooth, organized layout keeps customers on your site longer and encourages repeat visits.
- Mobile-Friendly: Clean, structured menus work better on smaller screens, reducing frustration.
2. Improved SEO
A well-structured site helps search engines understand and rank your pages better.
- Targeted Keywords: Sub-pages allow you to rank for more specific terms, increasing visibility.
- Logical Sitemap: Search engines reward sites with clear hierarchies that group related content.
- Better Internal Linking: Sub-pages create more opportunities for linking, helping search engines discover your content faster.
3. Cleaner Navigation
Without sub-pages, your menu can quickly become cluttered. Grouping pages keeps the navigation neat and easier to use.
- Dropdown Menus: Sub-pages help keep the menu compact, even with many product categories.
- Easier Management: Organized pages make it simpler to update content or add new sections.
4. Enhanced Product Discovery
Sub-pages improve how customers explore your store, often leading them to products they weren’t initially looking for.
- Cross-Selling: Related sub-pages (like “Accessories” under “Women’s Clothing”) encourage customers to buy more.
- Seasonal Pages: Sub-pages for events like “Holiday Gifts” or “Summer Sale” keep your main menu clutter-free.
Troubleshooting Common Issues with Sub-Pages
Sometimes things might not work as expected. Here are some common issues and how to fix them:
1. Sub-Pages Aren’t Showing in the Menu
- Check the Link: Make sure each sub-page is properly linked in the menu settings.
- Clear Cache: Sometimes, changes don’t show immediately. Clear your browser’s cache or try viewing the site in Incognito Mode.
- Remove Store Password: Make sure that you remove the password protection of your store.
2. Sub-Pages Aren’t Nesting Properly
- Drag Sub-Pages Correctly: Ensure you’re dragging each sub-page slightly to the right, under the main page, in the menu editor.
- Use the Right Menu: Verify that you’re editing the correct menu (e.g., Main Menu vs. Footer Menu).
3. Menu Items Aren’t Updating on the Storefront
- Theme Issues: Some Shopify themes require additional customization for dropdown menus to work. If your sub-pages aren’t showing, try switching to a different theme to see if the issue persists.
- Publish the Theme: If you’re working on a new theme, make sure it’s published so changes are visible on your live site.
4. SEO Settings Aren’t Reflecting Correctly
- Resubmit to Search Engines: If changes to SEO settings aren’t appearing, resubmit your sitemap to Google Search Console.
- Wait for Updates: SEO changes can take a few days to reflect in search results.
Conclusion
Creating sub-pages in Shopify is an easy yet effective way to enhance your store’s navigation and organization. With a clean menu structure, customers will find what they need quickly, improving their shopping experience. Ready to take your Shopify store to the next level? Boost your earnings with Simple Affiliate—a powerful affiliate marketing solution built for Shopify. Sign up today and start increasing your revenue!
