If you manage a Shopify store, you’ll probably want to create 301 redirects at some point. This post covers what they are and how to create and manage them for your Shopify website. Keep reading if this is something you want to do for your own Shopify store.
301 redirects are important because they help maintain SEO and user experience when you change URLs in your store. You will probably need them when you update product pages, restructure collections or change your site navigation.
When you carry out these actions, you are usually going to have to change the URL of one or more pages. If you use a 301 redirect, that means that you’ll get to transfer the link equity from old URLs to new ones, which will help you keep your place for those pages in the rankings of search engines like Google or Bing.
301 redirects also prevent users on your Shopify store from hitting 404 errors.
404 errors occur when a user tries to access a page that no longer exists or was never available. You’ll want to limit or avoid these altogether on store since they create a bad user experience and hurt your brand image, ultimately leading to lost revenue. Also, search engines like Google view too many 404 errors negatively. They interpret these errors as a sign of poor website maintenance or outdated content. This can hurt your store’s search engine rankings.
The bottom line: you should use 301 redirects when rebranding, optimizing your Shopify site structure, or migrating from another platform.
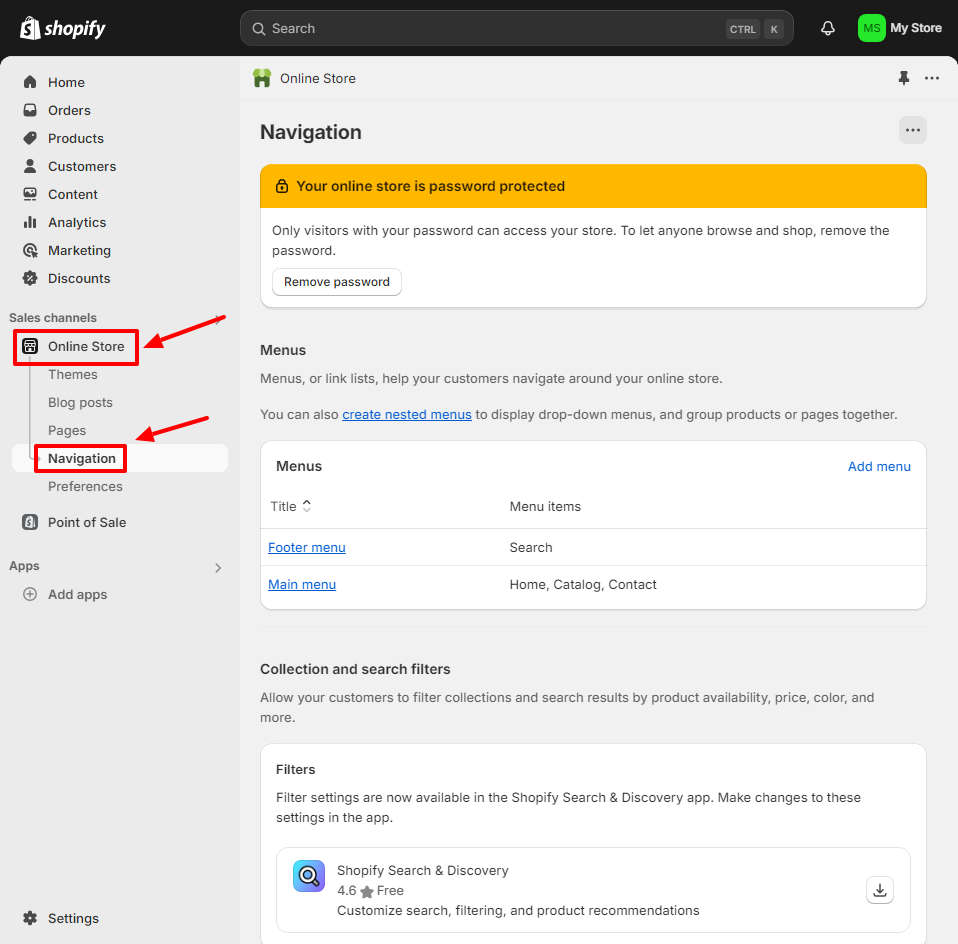
To create a 301 redirect in Shopify:
Use your store’s myshopify.com URL or custom domain if set up
Find this in the left-side menu of your Shopify admin.
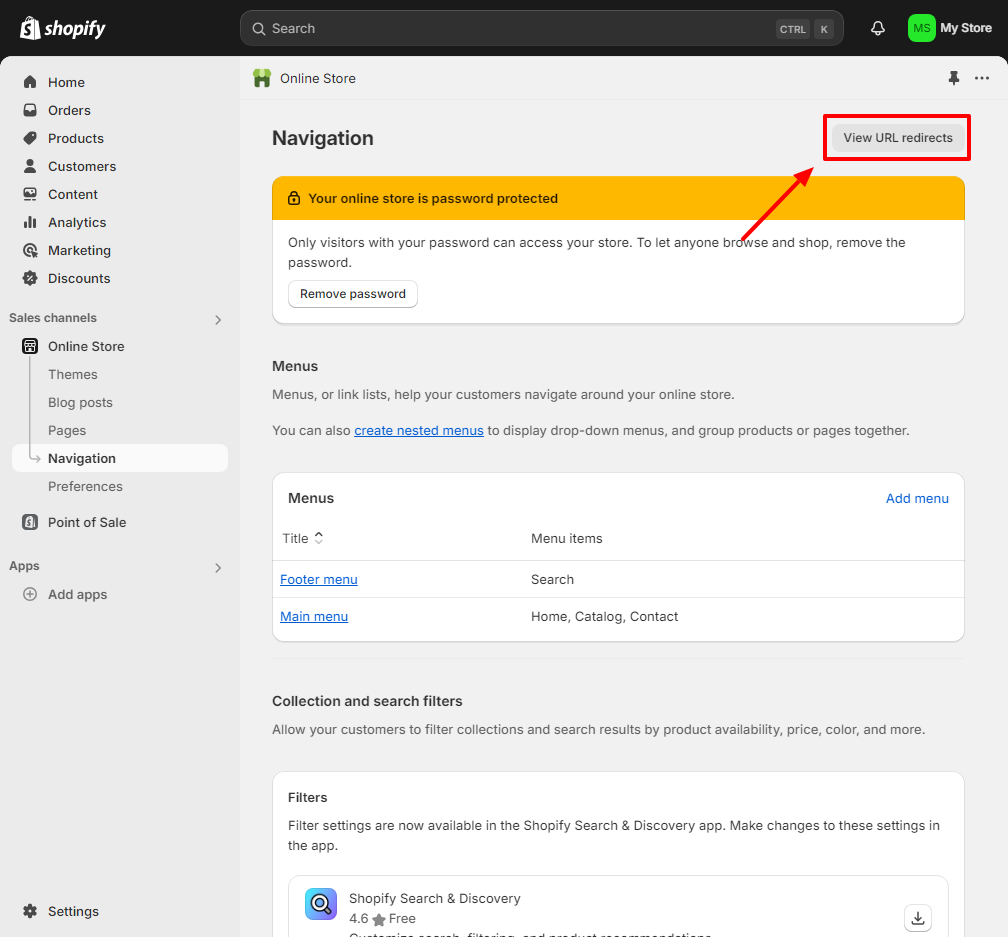
Located at the top of the page, next to “Navigation” and “Menus”
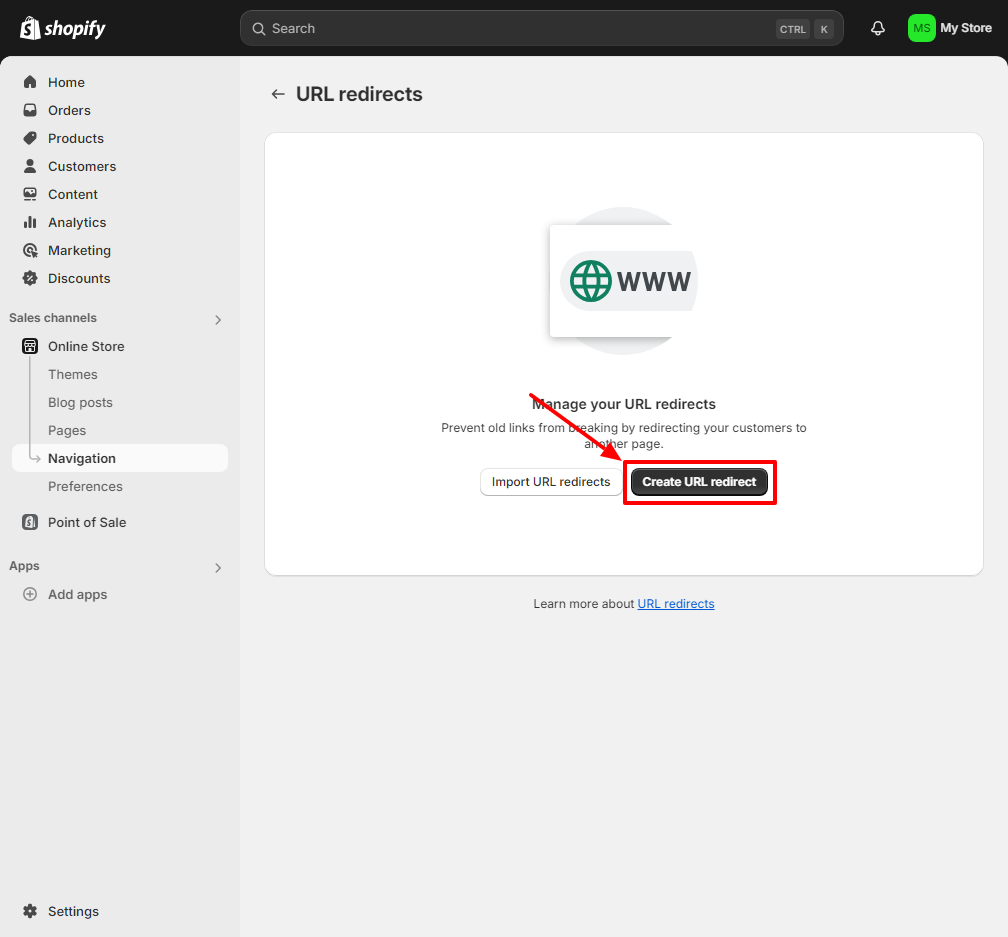
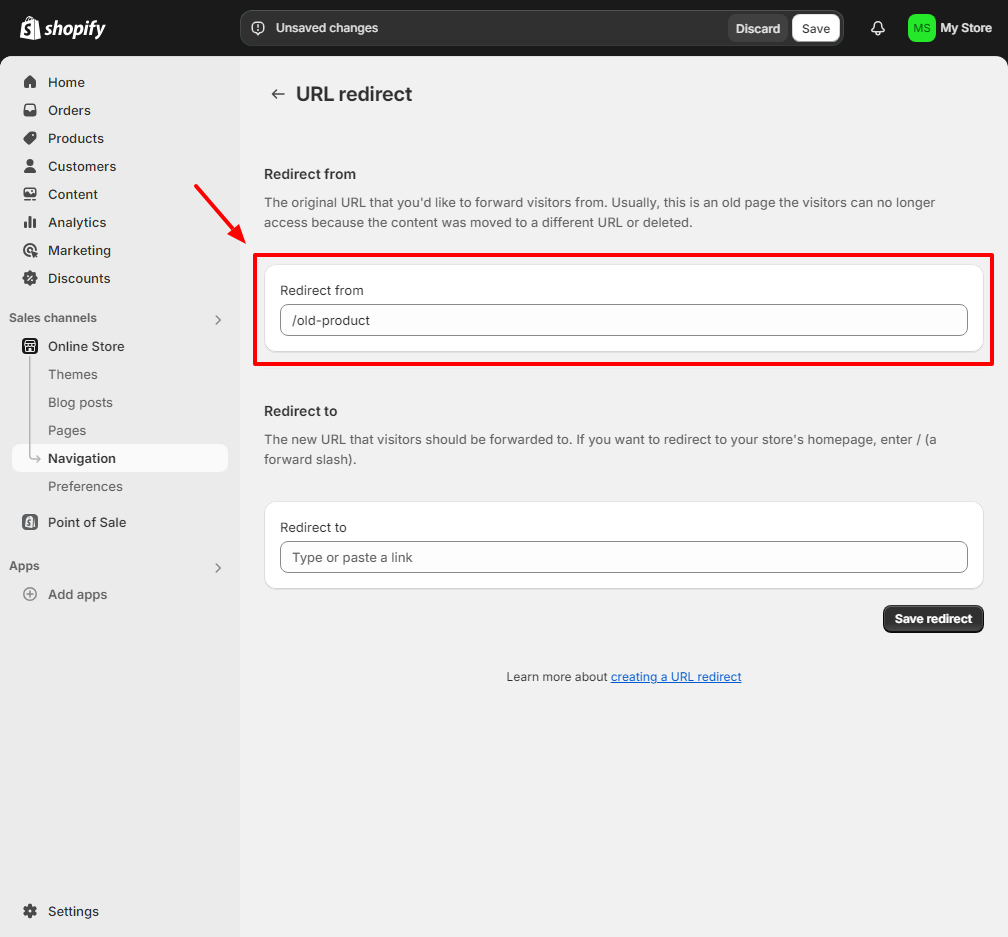
Look for the button on the URL Redirects page.
Use only the path, not the full URL. For example: /old-product
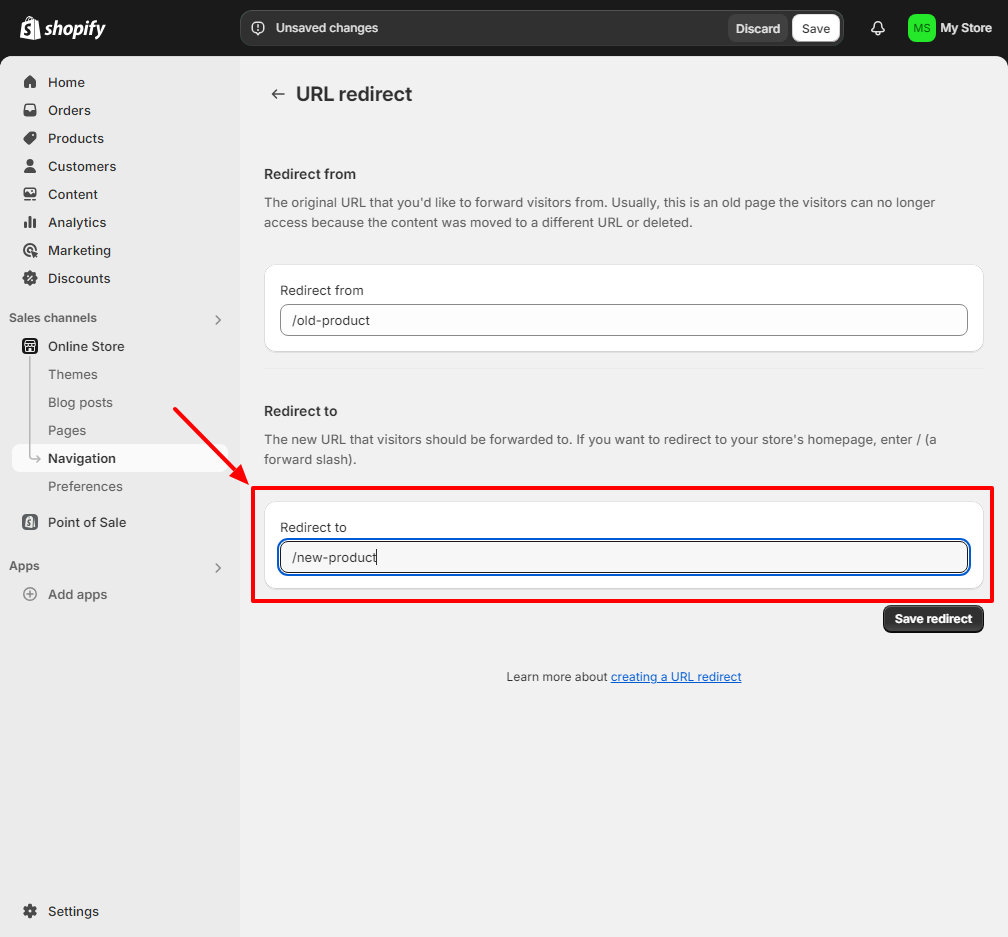
Again, use only the path. For example: /new-product
Shopify will immediately apply the redirect.
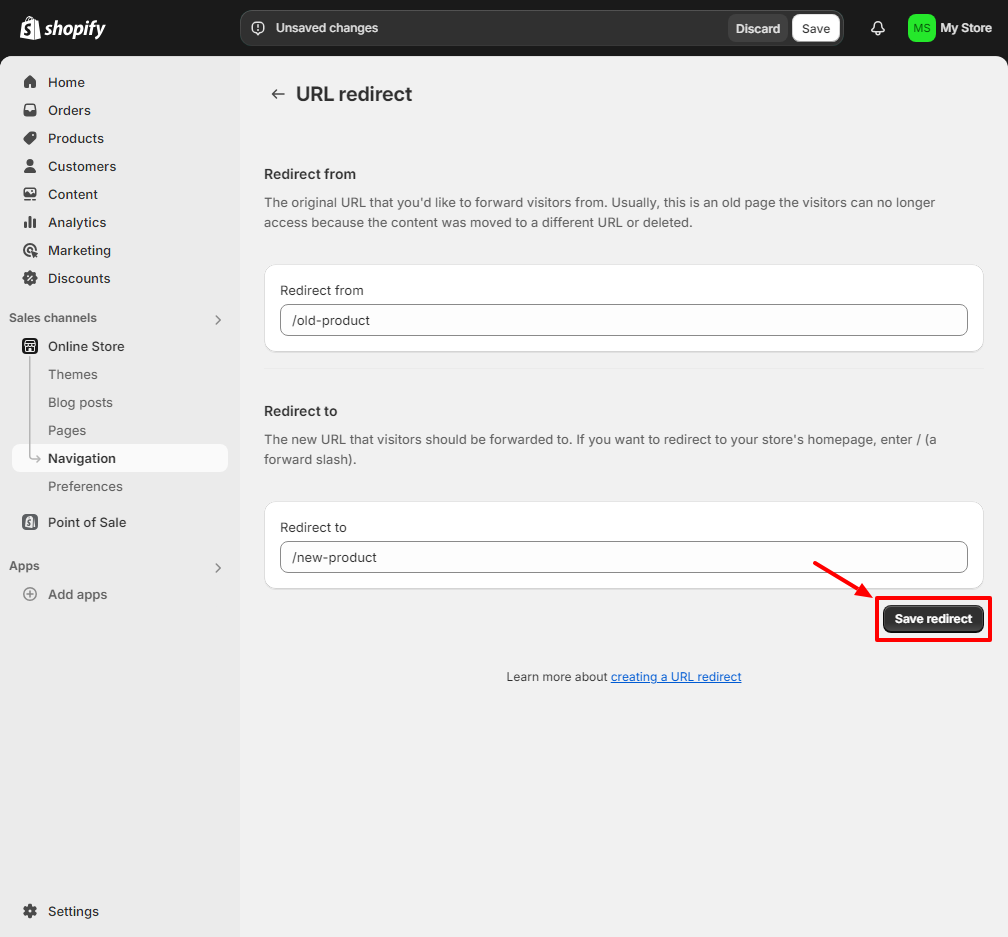
Remember: Always use relative paths (starting with /) rather than full URLs in both fields.
This maintains a good user experience and preserves the intent of the original link. If a specific product page no longer exists, redirect to a similar product or the relevant category page.
This limits the number of redirects your site has to process, which is usually better for your store’s site speed. It also helps search engines understand your new site structure more quickly.
Use tools like Google Search Console or third-party SEO tools to identify any broken redirects or 404 errors. Fix these as soon as you can so that you’re able to maintain SEO value and user experience.
Redirect chains are when you redirect to a page that itself redirects to some other page. These slow down your site and can confuse search engines. You should always make sure that you redirect directly to the final destination URL.
This is a better security practice for your users and aligns with current web standards. If you haven’t yet, consider upgrading your entire site to HTTPS.
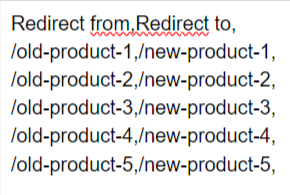
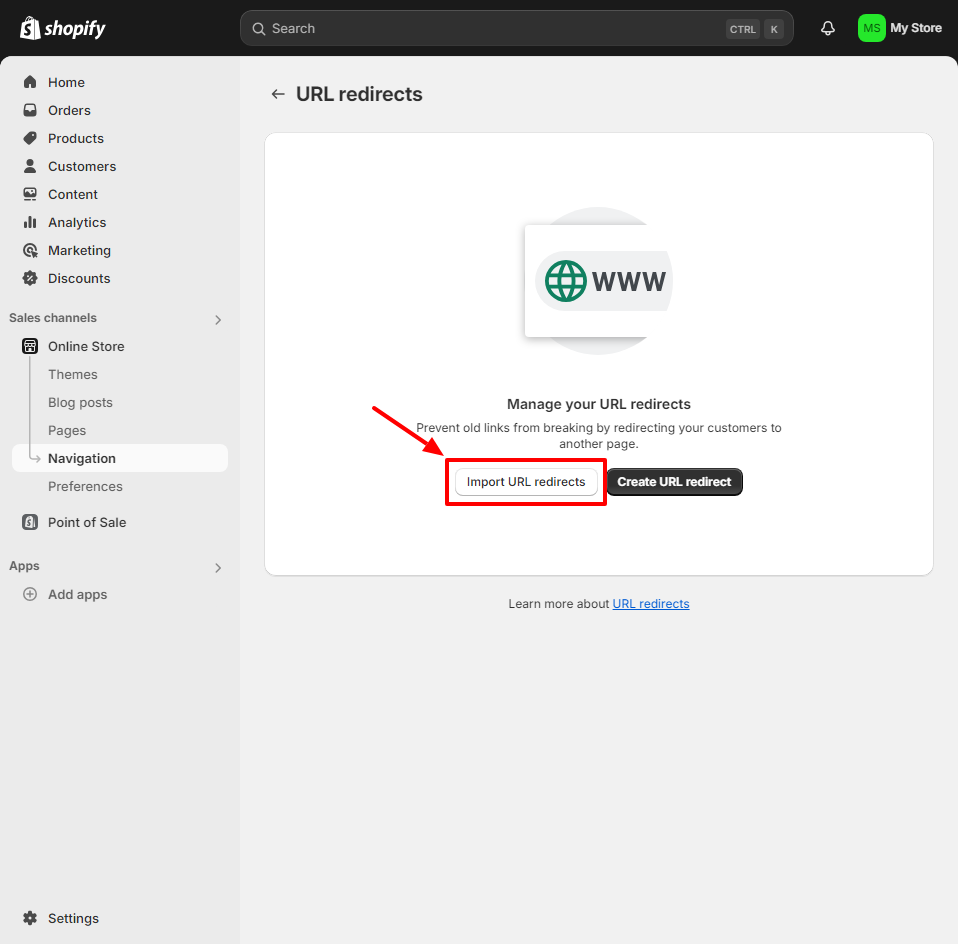
For multiple redirects, use Shopify’s bulk upload feature:
In the “Redirect from” column, list the old URL paths. In the “Redirect to” column, list the corresponding new URL paths. Remember to use relative paths (starting with ‘/’) for both columns. Don’t include your domain name.
In the URL Redirects section of your Shopify admin, click “Import redirects”. This button is usually located near the top right of the page, next to the “Create URL redirect” button.
Shopify will process your file and prepare the redirects. Make sure your CSV is properly formatted to avoid any import errors.
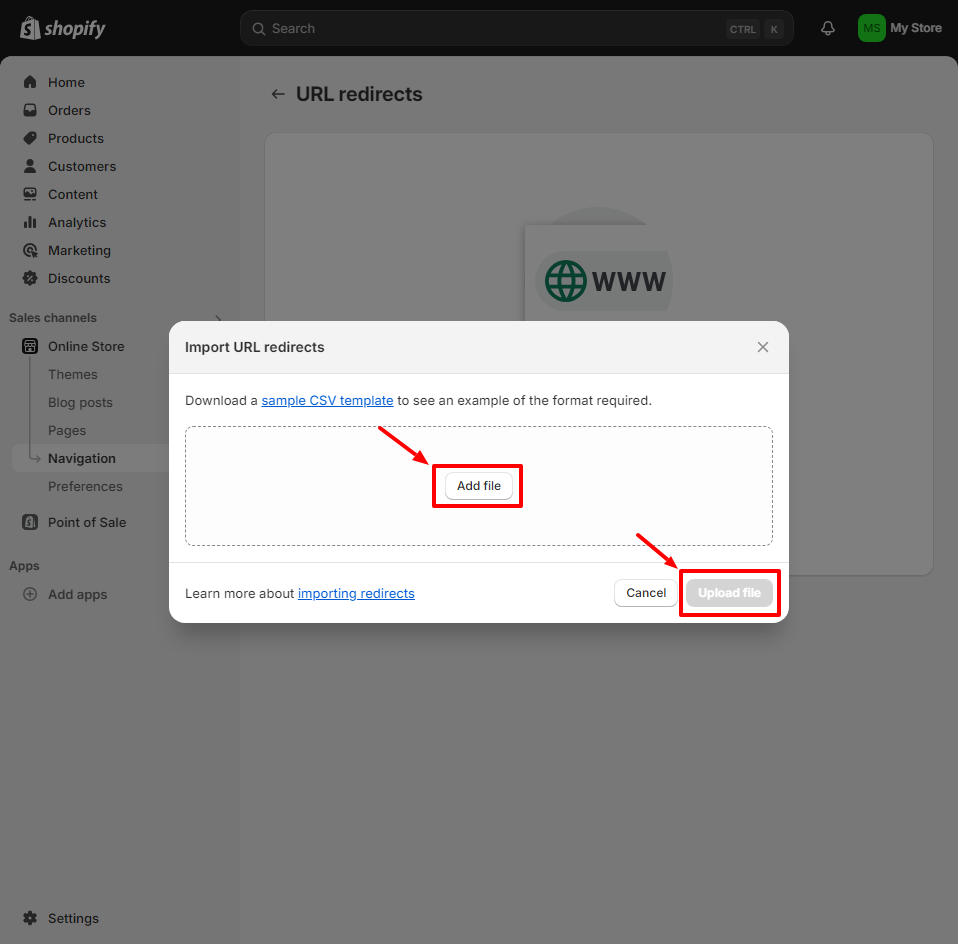
Shopify will show you a preview of the redirects it’s about to create. This is your chance to catch any mistakes or make last-minute changes. Once you’re satisfied, confirm the import to create all the redirects at once.
It’s a good idea to regularly monitor your redirects. Google Search Console (GSC) is your friend here – use it to check for crawl errors, which are oftentimes a sign that there are problems with your redirects. The Coverage report in GSC can highlight issues like 404 errors that might be caused by broken or missing redirects.
That’s it! Now you should be all set to create and monitor your 301 redirects in Shopify.
Oh, and if you want to add an easy to use affiliate app inside your store, check out Simple Affiliate. It’s the affiliate platform that works how you do – From refunds to collections to variants, you’ll find settings to fit your store.